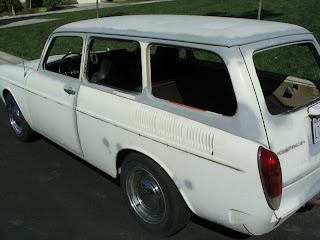
I had a local shop quote me over $4k to sand and paint the vehicle. This included $1200 in materials (!).
I want to drive this thing before gas gets to be $10 a gallon and asked them for a referral. They said the local MAACO in Escondido should be able to do a serviceable job for under $2k. They quoted me around $1500 to do some sanding, prep, and re-paint the factory color. We'll see how it goes.
Not having a windshield installed made it a bit challenging to drive 6 miles to the local shop. Ski goggles came in handy!
Here's the 'before' shots of the condition of the squareback before drop-off:
Dig the plate?
Monday, October 13, 2008
10/11 Golden (Bondo) Shower
OK it's been a while... I went out of action in mid-March for shoulder surgery, adopted a baby in May, and was out of the country from mid-June through mid-July. Long story short, I'm back in action, and back to getting this thing ready for paint. There's lots of POR-15 in the window sills, covered up with some primer.
I wonder, of the old VW's still in existence, how much steel is remaining and how much POR-15 has taken place of the metal?
Did some more bondo/sanding work on the car to get it ready for paint. Here are the shots:
Before - Note the dings. I ground down a few inches of cracked bondo and then filled in w/Lead filler.
After. I used mostly lead filler with a 'skim coat' :) of bondo over it.
Here's the dreaded welded-in patch. After a full weekend of sanding and build-up, you can hardly tell the difference between the original and replacement piece.
Here's the area beneath the passenger headlight. Nice and smooth!
Passenger door and rear quarter panel... good to go!
Subscribe to:
Posts (Atom)